Summary
Polygon Delivery Module is a component of Polygon POS. It enables a store to accept and manage orders which require delivery goods to a customer at a given address.
Polygon Delivery utilises the Delivery Sale type to:
•capture the customer name, address, and contact details at the time the sale is recorded by staff at the POS; or
•capture the customer name, address, contact details and loyalty membership details if the sale is received at the POS from Polygon Online ordering; and
•provide these details on the POS receipt and/or production dockets so that the goods can be delivered to the customer.
Polygon POS Management Configuration
Enabling the Delivery Module
The Delivery module will need to be enabled within Polygon POS Management database.
To do this:
•Choose the POS Network button from the toolbar.
•Highlight the POS Location for which you wish to enable the Delivery Module, right click and access the POS Location System Settings.
•Navigate to POS Terminal Settings | Delivery Module | General.
•Ensure that the Enable the Delivery module setting is turned on.
•Use the drop down to select the relevant POS Terminal in the Select LAN based Delivery server field.
•Complete the remainder of the settings as desired according to the further information below.
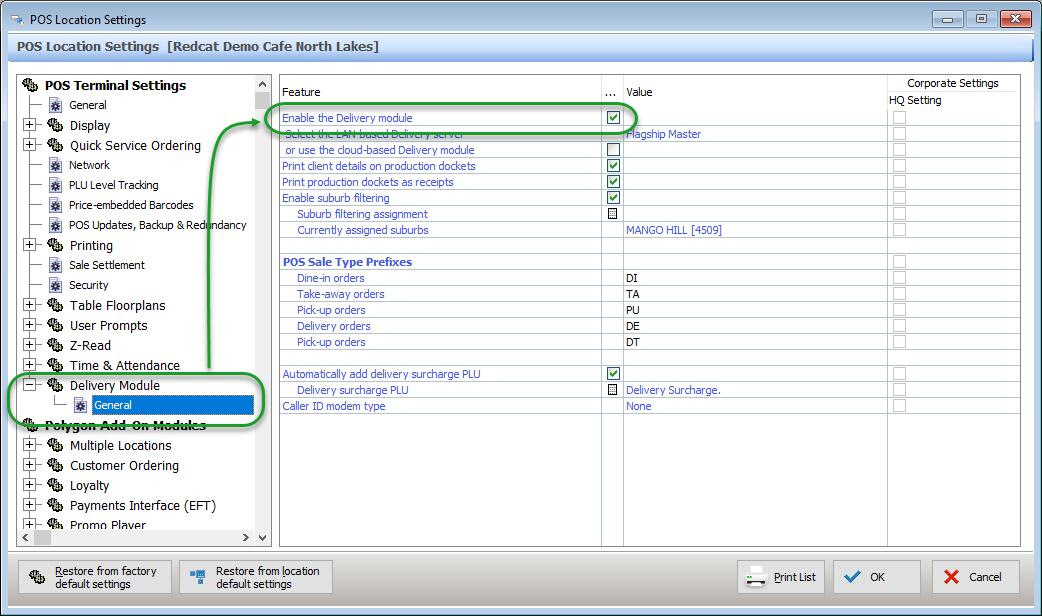
Print client details on production dockets
Selecting this option will include the address, contact number and name of the customer who is receiving the goods on the SmartPOS production dockets. Please note, these details are automatically printed on the customer tax receipts.
Print production dockets as receipts
If this option is selected, production dockets that are printed for use in the kitchen will print in exactly the same format as the receipts. That is, the production print will print a receipt instead. These can then be placed with the goods for delivery.
Enable suburb filtering
This should be enabled if you are also accepting delivery orders from Polygon Online Ordering. This will ensure that delivery orders are only accepted online for addresses that are within your delivery area. Polygon Online Ordering will validate addresses against the suburbs selected.
Use the pick list button to highlight the suburbs that fall within your delivery area.
Currently assigned suburbs
The drop down here will display a list of the suburbs selected above.
POS Sale Type Prefixes
These are the prefixes which apply to each of the valid POS Sale Types:
Dine In Orders DI
Takeaway Orders TA
Pick Up Orders PU
Delivery Orders DE
Drive Through Orders DT
If you choose to create Keypad Floorplans for Pick Up Orders and Delivery Orders the prefix specified for each will be used. That is, tables on the Delivery floorplan will be labelled DE1, DE2, DE3 etc, while tables on the Pick Up floorplan will be labelled PU1, PU2, PU3 etc.
Automatically add delivery surcharge PLU
Enable this if you wish to apply a surcharge to delivery orders automatically. Note: this surcharge will be added to Delivery orders entered at the POS and to Polygon Online Orders as the customer is checking out.
Delivery Surcharge PLU
Use the pick list to choose from the list of your programmed PLUs the PLU to be included in delivery sales.
Caller ID modem type
If you have a modem which identifies the incoming caller number, use the drop down to choose the relevant supported modem.
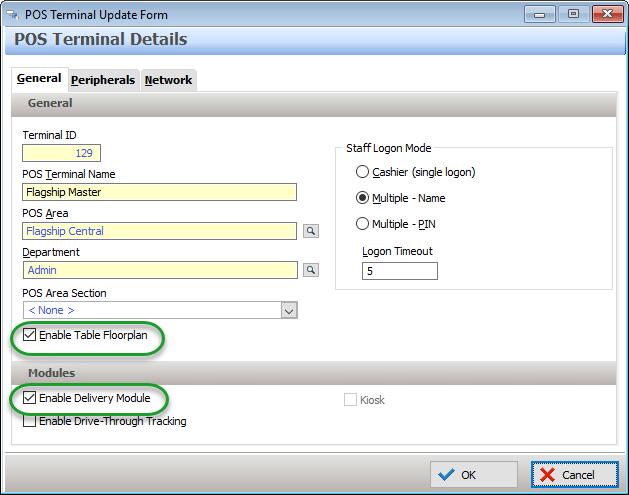
Completing POS Terminal Details
In the POS Locations file, for each POS terminal that will be using the Delivery module you need to do the following:
•Highlight POS terminal and click Change.
•On the General tab, in the General section, select the Enable Table Floorplan check box IF you want to utilise floorplans (that is, a floor of DE tables). This is not necessary, as Delivery sales may also be recorded using a Sale Type button.
•In the Modules section, select the Enable Delivery Module check box.
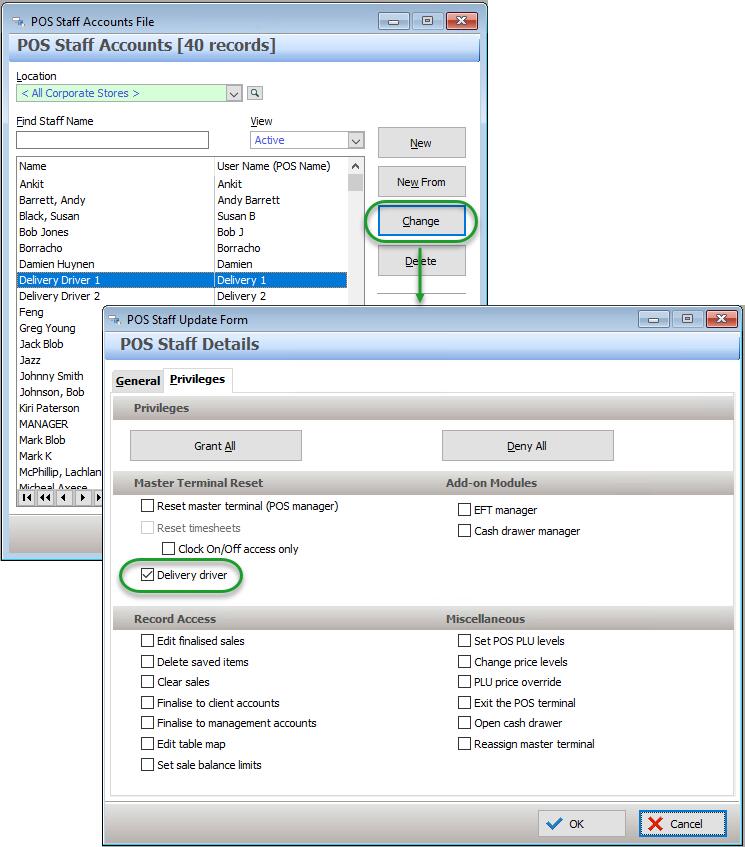
Setting up POS Staff as Delivery Drivers
For a POS Staff member to be recognised as a delivery driver in the Delivery module this must be added in their privilege options:
•Choose the POS Staff button on the toolbar.
•Highlight the relevant POS Staff member and use the Change button.
•On the Privileges tab, ensure the Delivery Driver option is on.
•Choose OK to save.
Setting up the Floorplans (Table Maps)
It is not a requirement that you have floorplans for Delivery as entering the orders using Sale Types will activate the required functionality (collection of contact and address details, and inclusion of surcharge if programmed), however it is possible to program specific floorplans which will automatically assign either the Delivery or Pick Up sale types when the table is opened.
To setup up your Delivery and Pick up Table maps:
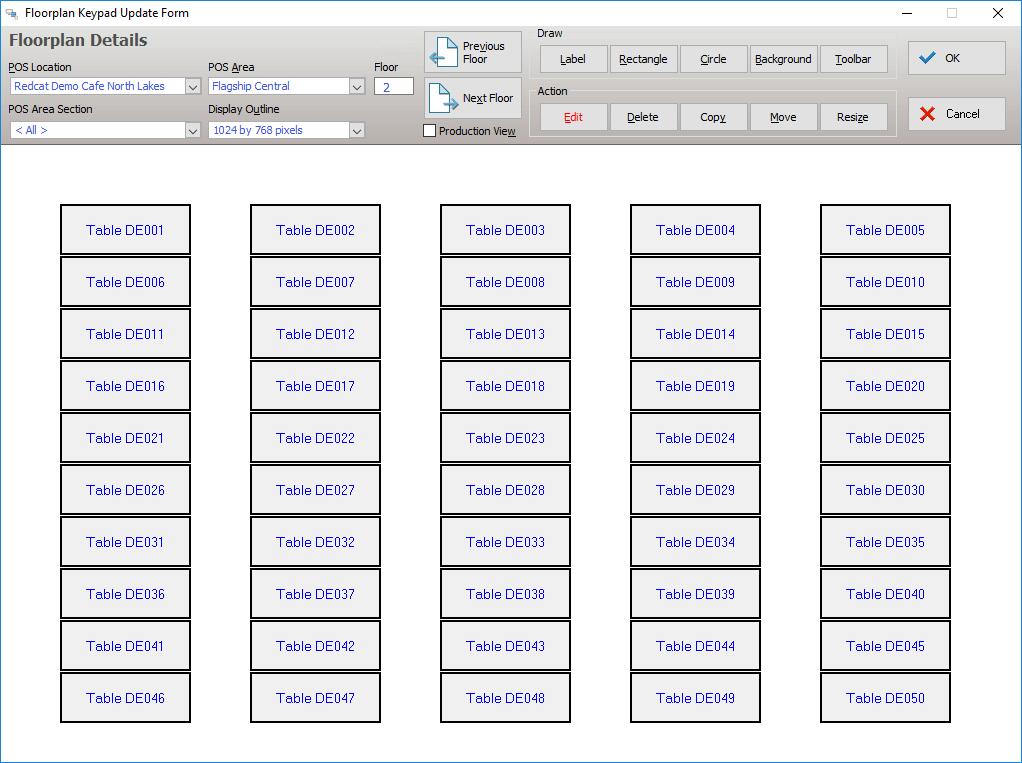
•Select Keypads | Floorplan Keypads from the Main Menu
•Select the relevant POS Location and POS Area.
•Click on the Toolbar button, choose the Auto-populate tab and select the Delivery Module – Delivery Keypad button. The floorplan will be created with 50 DE (delivery) tables.
•If you also which to have a floorplan for Pick Up sales, click on the Next button to navigate to the next page. Click on the Toolbar button, choose the Auto-populate tab and select the Delivery Module – Pick Up Keypad button. The floorplan will be created with 50 PU (Pick Up) tables.
•Make any modifications to these two floorplans as required.
Using the Polygon Delivery Module
Processing a Delivery Sale
To enter a Delivery sale, either:
•choose a Delivery Table from the Delivery floorplan (a DE table number), or
•use the Delivery Sale sale type button on the ordering keypad to start.
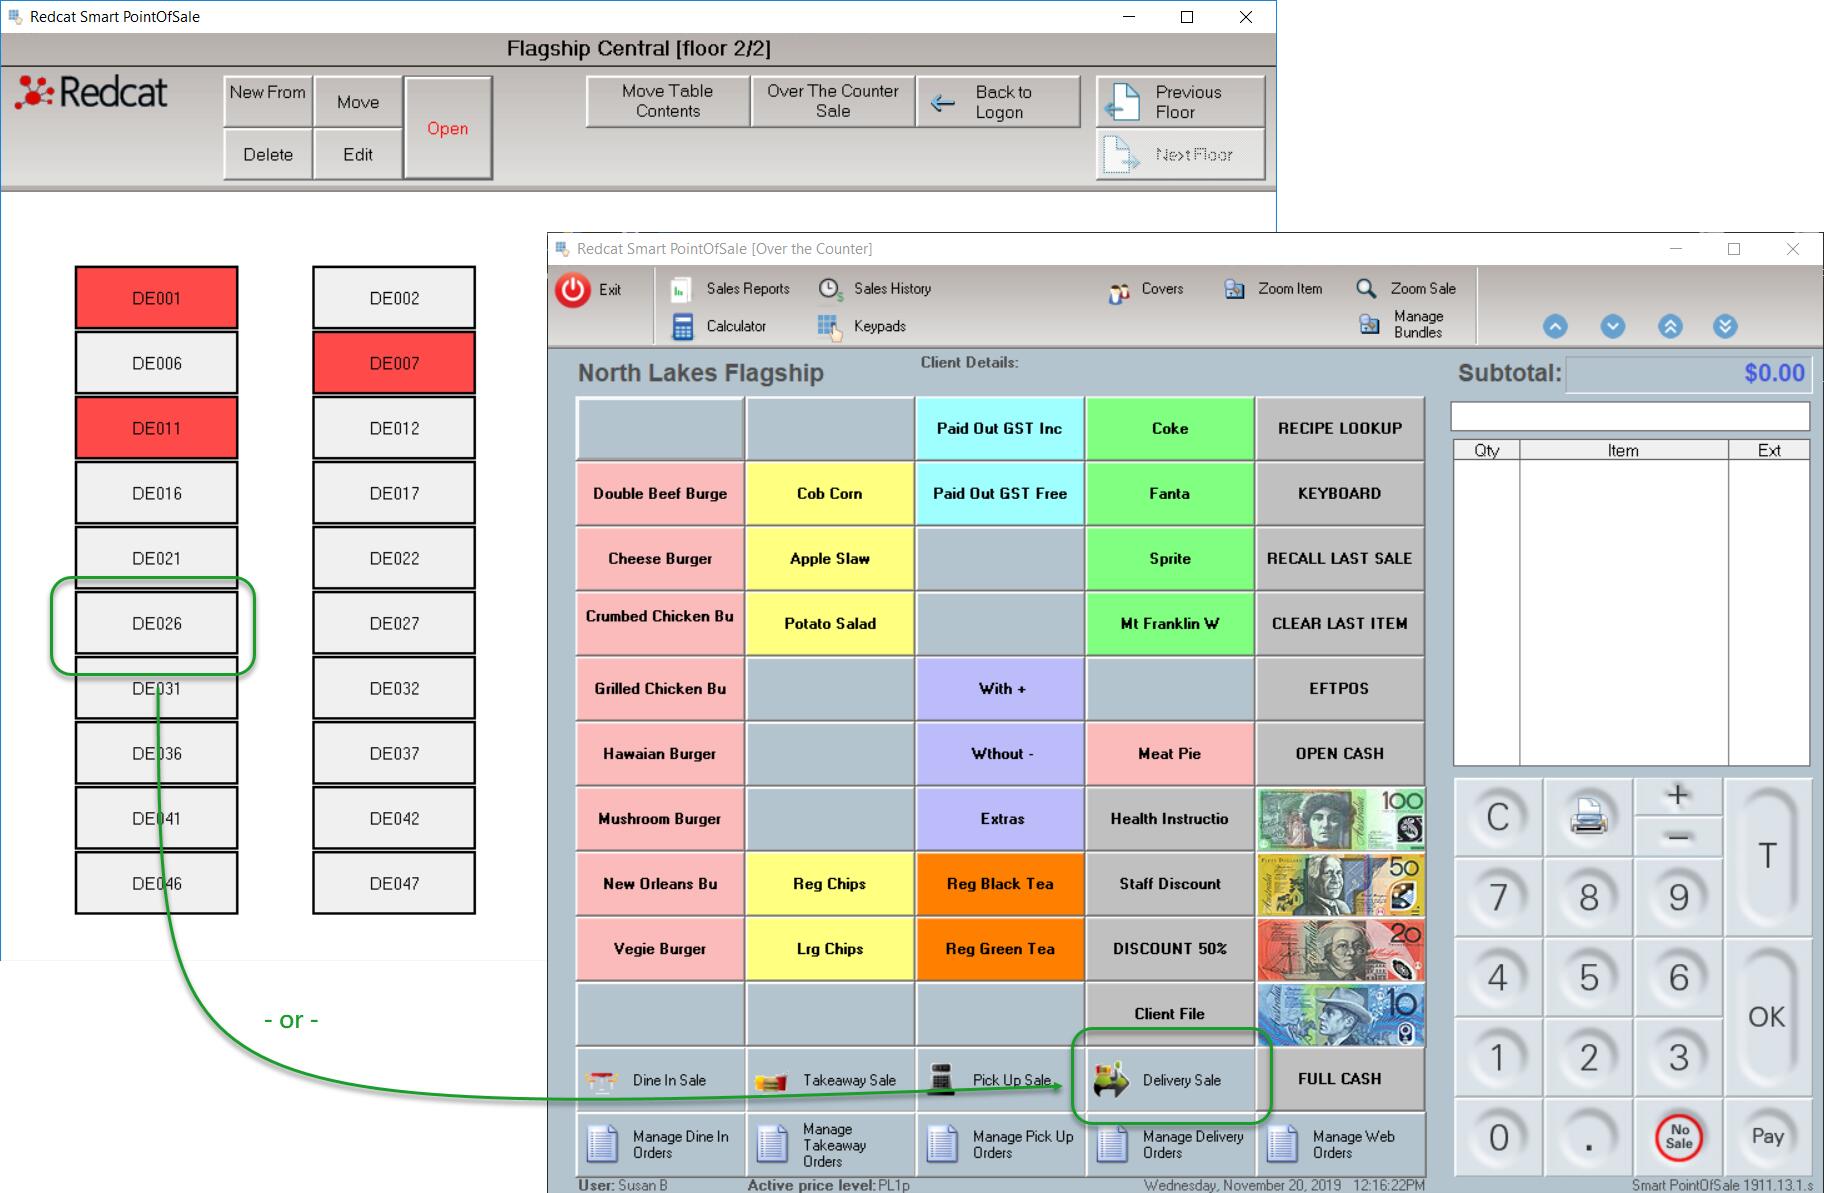
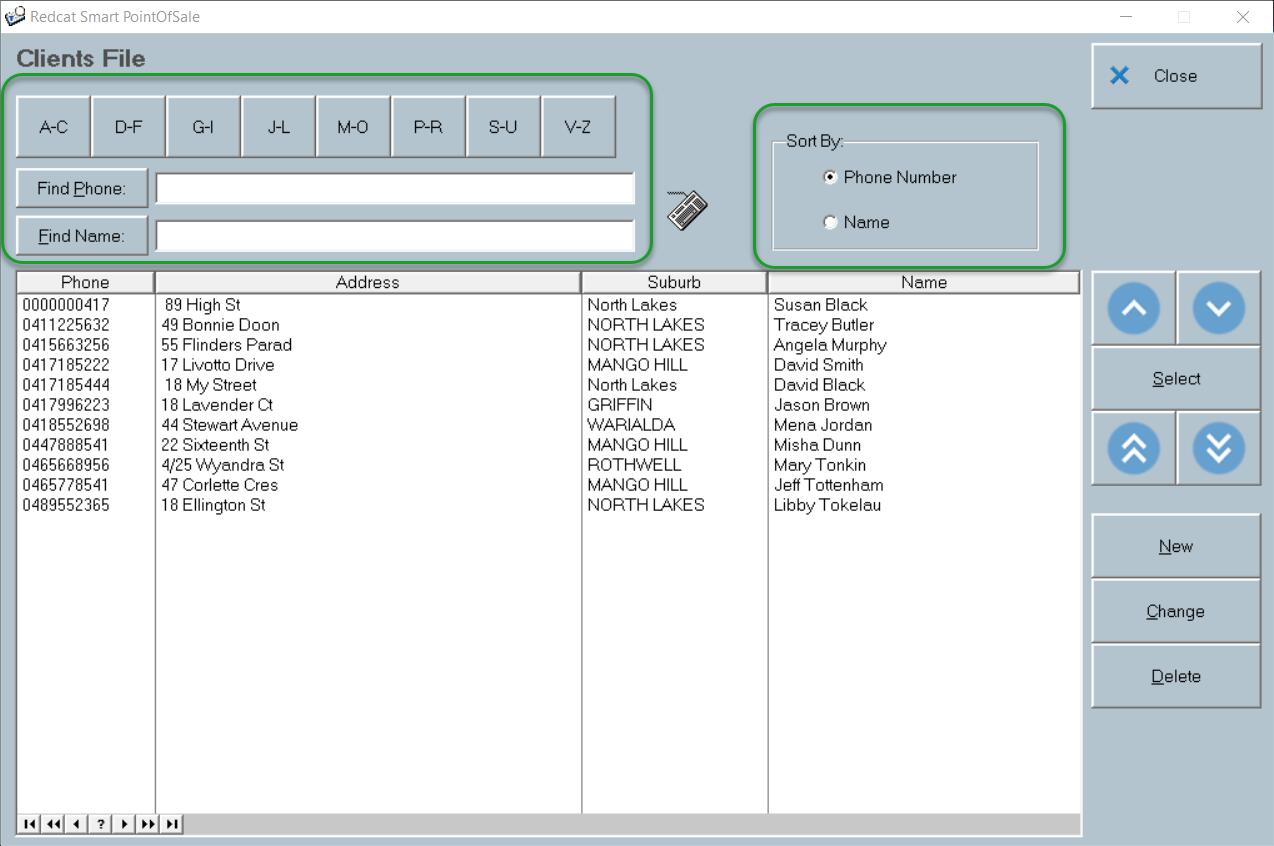
The Clients File will be displayed.
The Clients file can be sorted by phone number or by name and you can search using the Find Name |Find Phone or using the alphabetical filter buttons (eg. A-C, D-F).
Choose the relevant client in the list and use the Select button, or add a new client to assign to the sale.
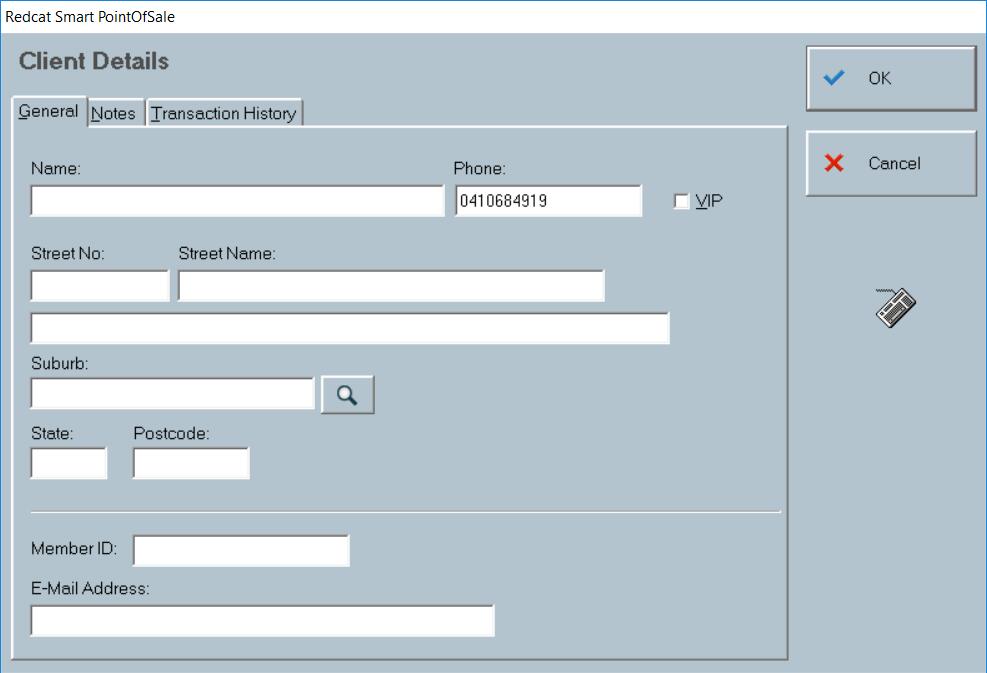
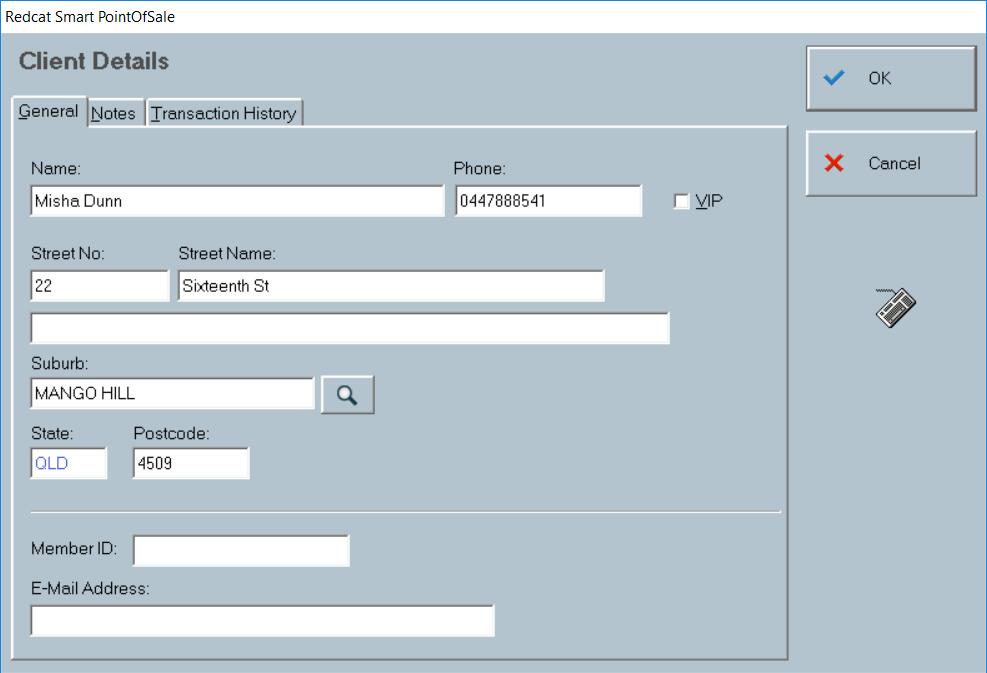
Adding a new client
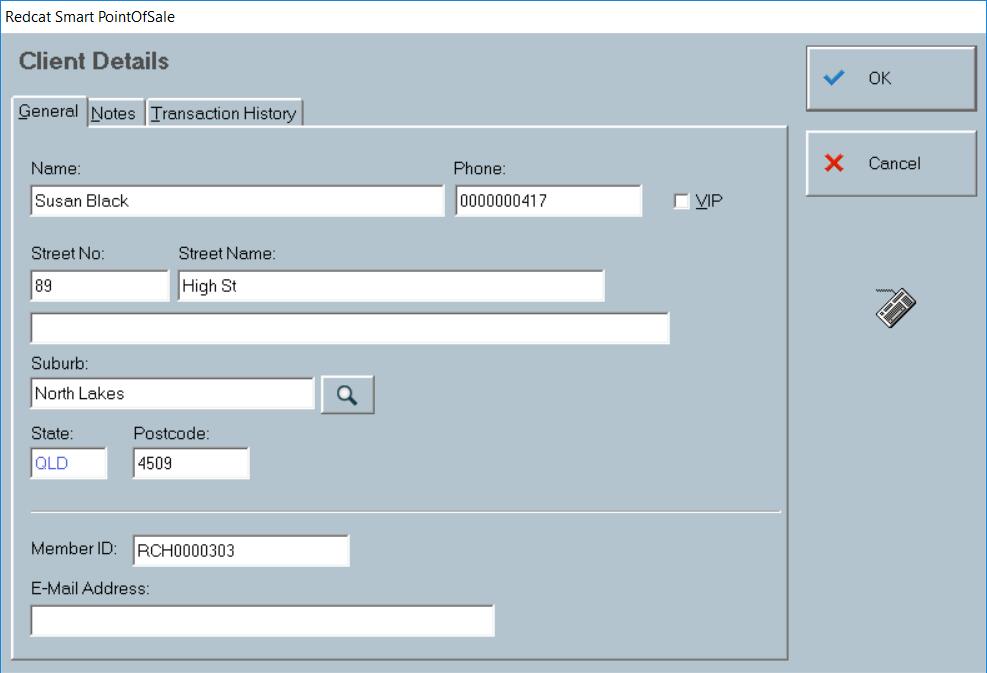
To add a new client:
•Click on the New button
•Enter in all available Client Details in the General tab.
•When entering the Suburb, use the browse button to display the postcode file. When you select the suburb, the State and Postcode fields will also be filled.
•Adding the customer’s loyalty membership number in the Member ID field will mean that the member details will be attached to the sale and the member will accrue any applicable loyalty points.
Managing Delivery Orders
Delivery orders can be managed using a ‘manage sale type’ button programmed on an ordering keypad of the POS terminal. It should read Manage Delivery Orders.
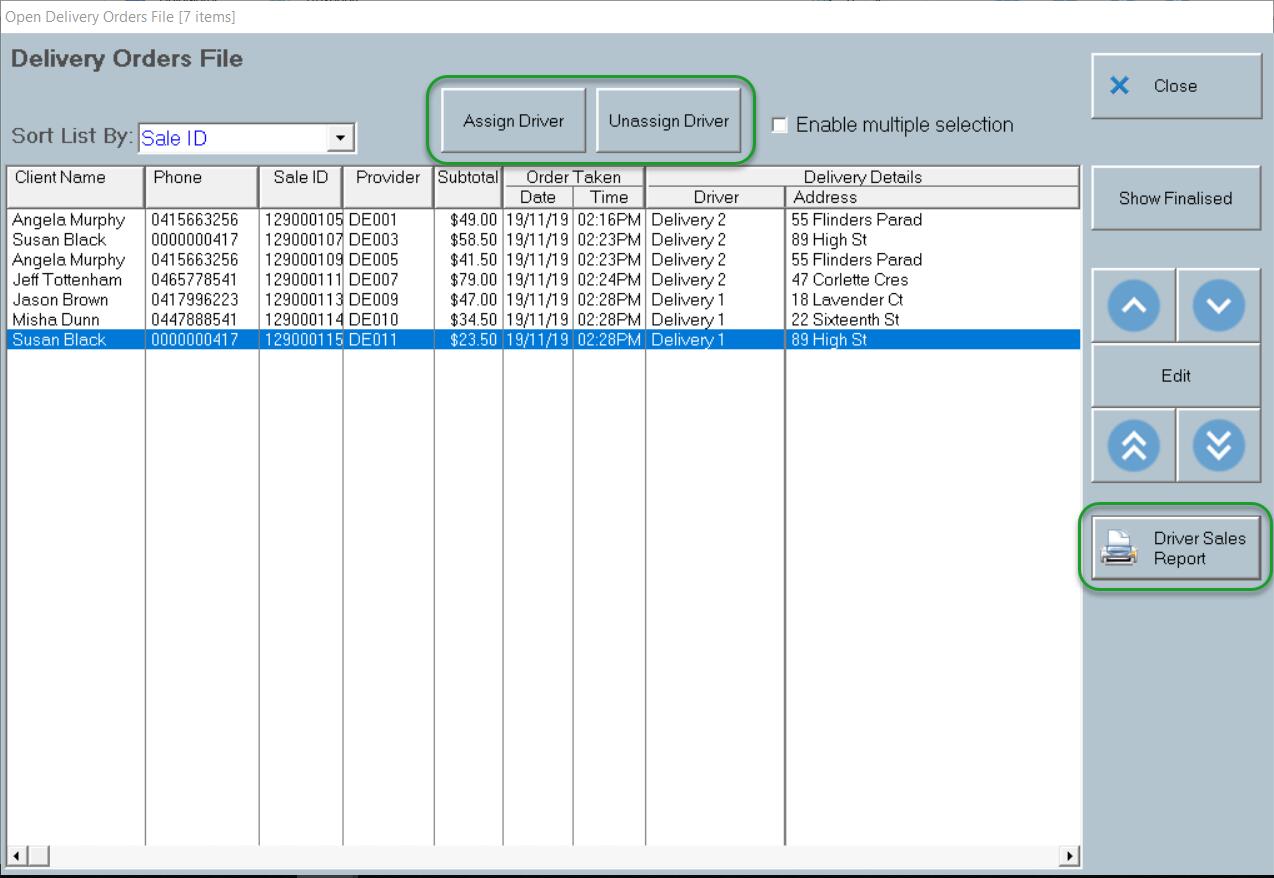
The Deliveries File is opened, and displays either the list of Open or Finalised delivery sales – use the Show Finalised | Show Open button to swap between each list.
Each line details:
•The customer name.
•The customer phone number.
•The Sale ID.
•The Provider (the DE table number for sales entered locally, and Online Order for sales originating from Polygon Online Orders).
•The Subtotal of the sale.
•The Order Date and Time.
•The Delivery Driver (if assigned).
•The Delivery Address.
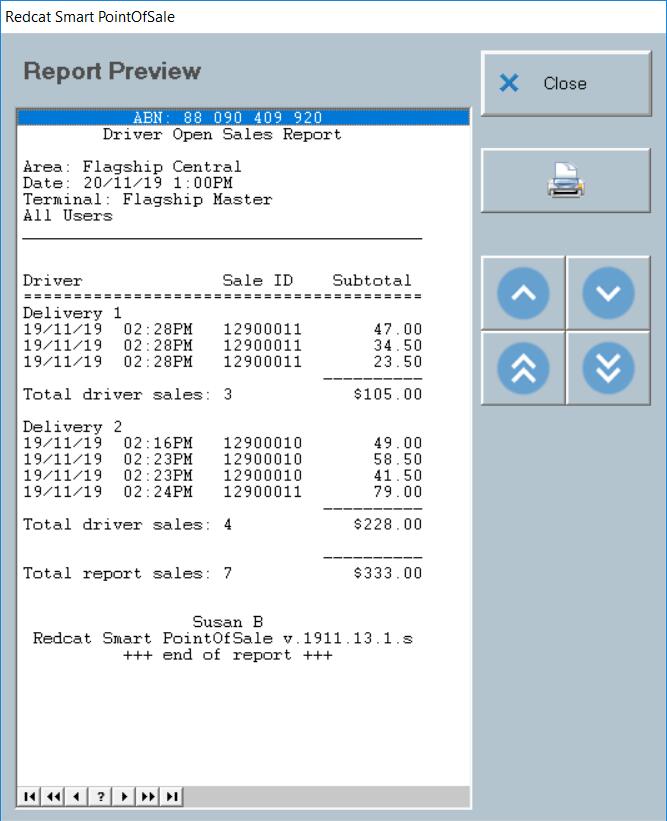
Driver Open Sales Report
You may print a report of the open delivery sales, grouped by Delivery Driver using the Driver Open Sales Report button.
To assign a Driver to an order or several orders
A specific delivery driver can be assigned to each delivery order.
•Select the Enable Multiple Selection check box if you wish to assign the same driver to more than one order.
•Choose the Assign Driver button
•Select the relevant Driver from the list of drivers presented in the Staff File – Drivers.
•The Driver name will now be displayed in the Delivery Details section for that (those) order(s).
To Unassign a Driver
If you need to remove the driver assignment for an order:
•Highlight the order and then click on the Unassign Driver button
•The delivery details will be updated
Driver Sales Settlement
If you are sending delivery orders with the driver to collect COD, you can record the payment multiple orders upon the driver return. Please note: all the orders will be finalised with the CASH payment method.
To finalise a Driver’s sales
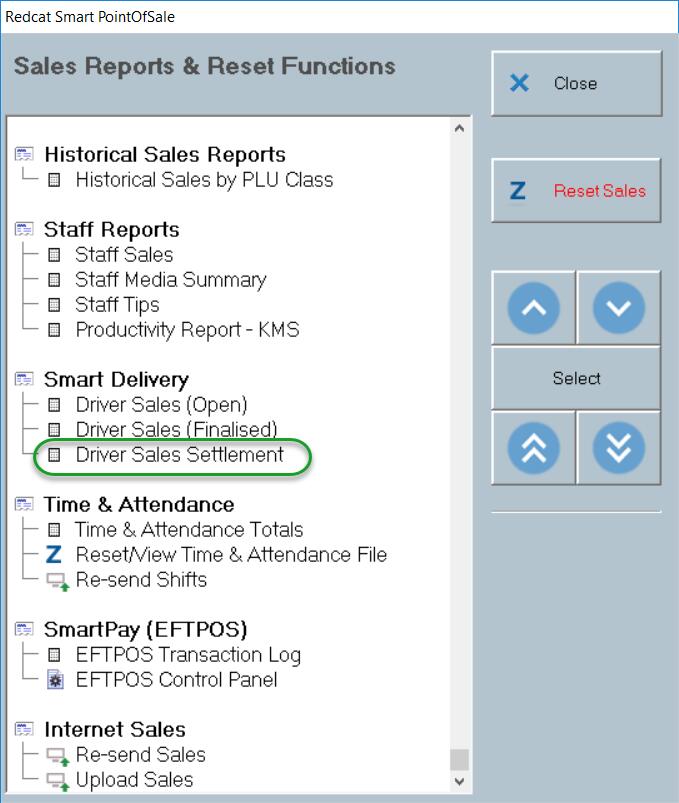
•Access the Sales Reports button on the toolbar (requires password).
•In the SmartDelivery section, choose the Driver Sales Settlement report.
•Choose the relevant driver name from the Staff File – Drivers and use the Select button.
The Delivery Orders File is displayed with the open sales assigned to the selected driver already selected. The subtotal of the selected sales is also displayed in the Driver Total field.
•To record these sales as finalised use the Pay Selected Sales button.
•If not all the open sales for this driver are to be finalised now, click on a sale to deselect if from the list. The Driver Total will also be recalculated.

•Choose Yes when asked to confirm the finalisation of the sales.
Auto Phone Number Recognition
If you have a modem which recognises and passes the callers phone number installed (Caller ID Modem) the system will automatically capture the number and recognise an existing client or create a new entry in the client file.
When you receive a phone call, open a Delivery sale (either before answering or during the call) and the caller number will be recognised.
If the phone number matches an existing client, a message will be displayed:
Caller successfully identified.
Choose the OK button.
The client file record for the match to the phone number will be opened for you to confirm the client details.
If the phone number does not match an existing record in the client file the following prompt will be displayed.
Unknown Caller
Phone Number: 0410684919
Do you want to create a new client for this phone number?
Choose the Yes button and a new Client Details record will be presented for completion. The phone number will already be filled in.