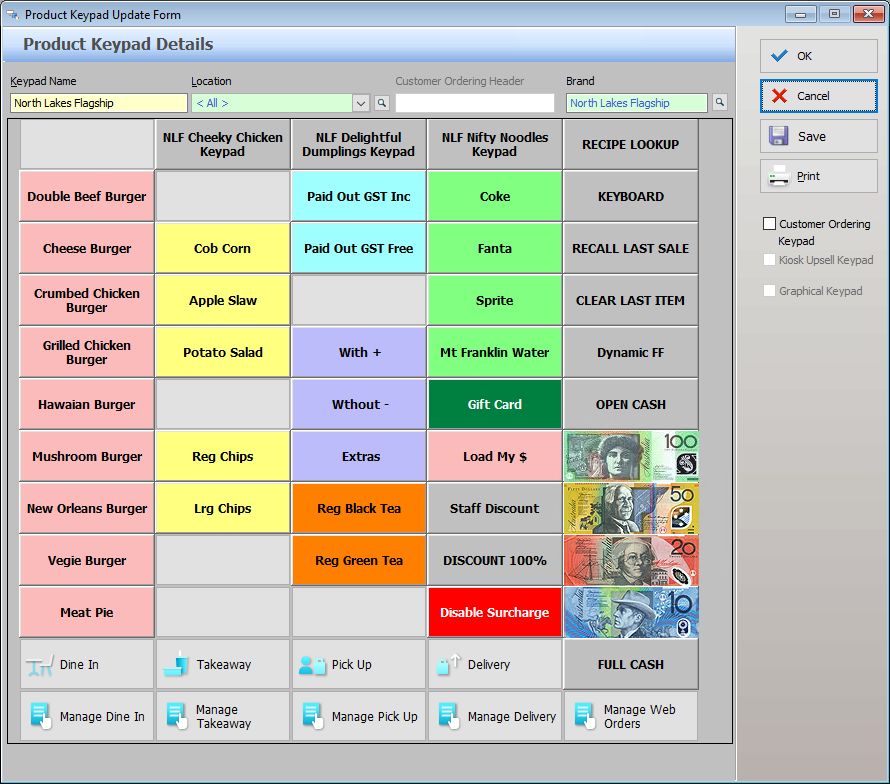
This form allows you to view a product keypad and create or remove, edit and move keypad buttons on a product keypad. The product keypad will be used at the POS Terminal to record customer orders.
From Polygon POS Management, Select the Product Keypads button from the toolbar, Then click the New button to create a new product keypad, or, Highlight an existing Product Keypad and click the Change button to modify the selected keypad.
|
Enter the following information at the top of the Product Keypad Details form:
•Keypad Name - When creating a keypad a name must be entered in the Keypad Name field, each name must be unique. This name can be changed at a later time.
•POS Location Assignment - Multi-location users can limit keypads to only be available at a selection of locations. Use the browse button ![]() at the end of the POS Locations box to select which locations this keypad will be available from.
at the end of the POS Locations box to select which locations this keypad will be available from.
•Brand - if Virtual Brands are enabled, select the relevant Brand using the ![]() browse button next to the Brand box.
browse button next to the Brand box.
Options available from the Product Keypad Details form are described below: •To add a new Keypad Button - Click on a blank square to access the Keypad Button Details form where you can configure the new button. •To edit an existing Keypad Button - Click on the button you wish to modify. This will load the Keypad Button Details form where you can make the desired changes; •To clear an existing Keypad Button - Click on the button you wish to edit. This will load the Keypad Button Details form. Then click the Delete Key button at the bottom left of the form; •To move the position of a Keypad Button - With your mouse, Right click on the keypad button and then Left click on the destination. If a keypad button already exists in the specified destination the two keypad buttons will swap positions.
|
| Product Keypad - Polygon POS |
Options available from the Product Keypad Details form are described below: OK - Saves and closed the Product Keypad Details form. Cancel - closes the Product Keypad Details from without saving. Save - saves the changes to the Product Keypad Details form either since it was opened, or since the last save. Print - prints a copy of the Product Keypad Details form layout (please note that images assigned to buttons are not included in this print - buttons with images will show the outline and content text). Customer Ordering Keypad - this tick will indicate if the keypad has been designated as a Customer Ordering Keypad.
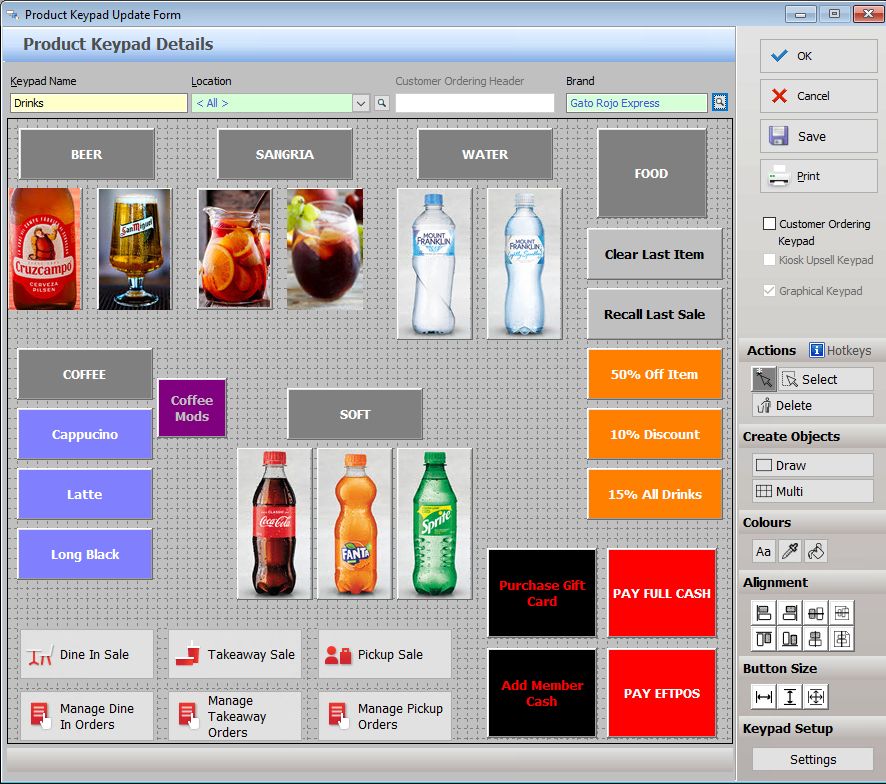
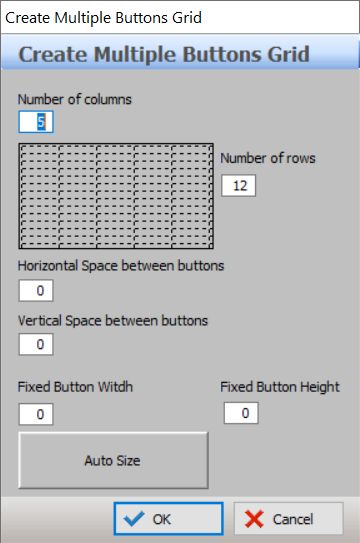
The Product Keypad programming space is presented with a grid background. This is to assist with locating and aligning keypad elements. You will add keypad elements to your keypad using the drawing toolbar or right click menu. Once a keypad button is drawn, the Keypad Button Details form is presented so you can configure the new button. If you double click on an existing button the Keypad Button Details form is presented for you to view or change the button details. |
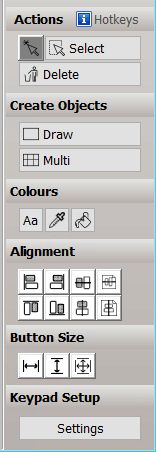

If you right click on any object on the keypad you will presented with a menu to further assist with creating your keypad.
Edit [button text] - This option will open the Keypad Button Details form for you to edit the content of the button. Swap - Choose this option then click on another object: the content of the buttons will be swapped. Copy - Choose this option to copy the content of the object. Paste - Choose this option to paste previously copied content to this object. Delete - Choose this option to delete the object from the keypad (please note, this will delete the entire object if you want to clear the content from the object use the Clear Key button on the Keypad Button Details form.) Format - If multiple objects are selected, this menu item will offer Duplicate - When you choose this option the object (including content) will be duplicated. Move to an empty space on the keypad and click to install. Refresh - Refresh the keypad. Grid Setup - Choosing this option will display the Settings Form. |

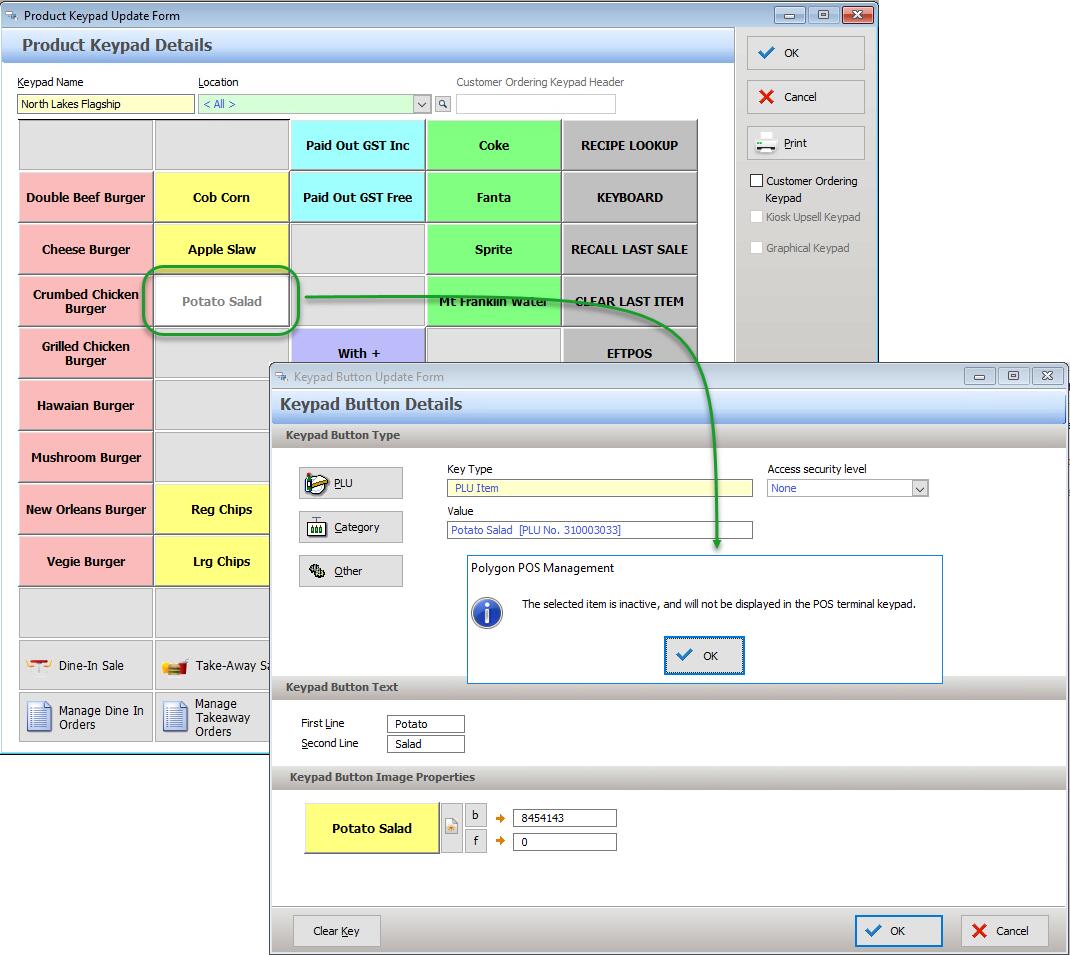
If a PLU has been made inactive in the PLU file, and this PLU has been assigned to a keypad button it will appear with grey font on a white background when the keypad is opened. If you click on the button and open the Keypad Button Details form, a message will be presented The selected item is inactive, and will not be displayed in the POS terminal keypad advising that the button will not be visible once an update has been sent to the POS terminal.
|
If the Customer Ordering module is activated you will be able to specify keypads as Customer Ordering Keypads by ticking the checkbox on the right of the form. This assigns the keypad to be available on the internet for web based ordering. Keypads set as Customer Ordering keypads are not visible at the FOH registers.
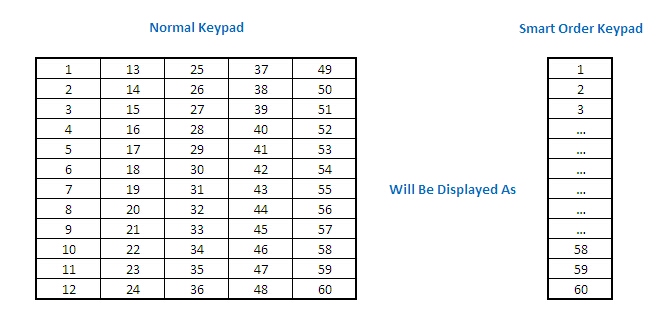
Although Customer Ordering keypads are shown in grid format at the BOH, they are displayed to the customer in a vertical format where each column from the grid is added to the last column, moving from left to right. See example below
|
See Also:
Polygon POS Management > Product Keypads File
Polygon POS Management > Keypads Overview
Getting Started with Polygon POS Management