If you are using varying price levels for PLUs, you should consider the best way for those levels to be activated. For example, a price level used for loyalty membership pricing and discounts will need to be activated on demand when a member sale is made. However, if a price level is used for a designated time period, such as all day Sunday or a Happy Hour from 4pm to 6pm, then automatic changes can be programmed to be activated in a specific POS Area. This section covers automatic price level changes. For information about manual price level changes see section Polygon POS Management > Product Keypad > Other Buttons - Price Level Change.
Note: Manual price level changes apply locally to the terminal on which the change is made. Automatic price level programming will be applied to all terminals in a POS Area.
From Polygon POS Management, Select Products from the main menu and then select Scheduled Price Levels.
|

Programming Scheduled Price Levels:
Scheduled Price Levels need to be enabled for each location from Polygon POS Management > POS Terminal Settings > General.
Once Scheduled Price Levels are enabled, follow these steps to specify your price level schedule.
1.Select the POS Location (multi-location users only) ;
2.Select the POS Area;
3.Select the Day (each day will have its own Price level table);
4.Click in the Level box and select the Price Level that you wish to use for this period;
5.Enter the Level Description. This will be displayed in a pop up message at the POS terminal when the price level change occurs;
6.Enter the time this price level will start. NOTE: Since the programming of these entries is specific to one day at a time, the earliest start time you can enter is 12:00AM;
7.Enter the time this price level will finish. NOTE: Since the programming of these entries is specific to one day at a time, the latest finishing time you can enter is 11:59PM. Therefore, to program a change for Saturday night from 10:00PM – 2:00AM, enter a period in the Saturday file from 10:00PM – 11:59PM, and in the Sunday file from 12:00AM – 2:00AM.;
8.Repeat steps 4-7 for each price level change for each day;
9.Click Save to save changes.
Consecutive Price Level changes
When programming two consecutive automatic price level changes, the first must finish 1 minute before the second. For example, 1:00pm -3:00pm and then 3:01pm - 5:00pm.
Price Level change over two days
As Price Level changes are programmed one day at a time, the latest finishing time you can enter for a particular day is 11:59PM. Therefore, to program a change for Saturday night from 10:00PM – 2:00AM, enter a period in the Saturday file from 10:00PM – 11:59PM, and in the Sunday file from 12:00AM – 2:00AM.
Removing Price Levels
To remove a price level change highlight the price level entry and click the Delete button.
NOTE: If an Automatic Price Level Change is deleted and an update sent to the terminal whilst that Price Level Change is active, the price level will need to be adjusted manually (using Price Levels Change Keypad Button).
Using the Copy/Paste feature
This feature can be used if you wish to copy a table of Price Levels from one day to another. If you have a multi-location database you can copy and paste between locations.
•Click on the Copy button while in the source table of Price Levels.
•Navigate to the destination/s table of Price Levels and click on the Paste button.
•Click Save to save your changes
Printing
Click the Print button to generate a report showing the currently displayed price levels. This report can be printed, saved or converted to CSV format which can be opened with spreadsheet programs.
Open Tables
For open tables being served across a change in price level periods, two different prices may have been applied to multiple orders of the same item. Consider how you will standardise procedures for this kind of situation.
The active price level at the terminal is shown at all times at the bottom of the keypad display. For example, ‘Active Price Level: PL1p’ OR ‘Active Price Level: PL3a’, where p stands for permanent (has been manually set or is the default price level) and a stands for automatic (has been programmed for a time period).
The following message is displayed at the FOH when a price level change occurs:
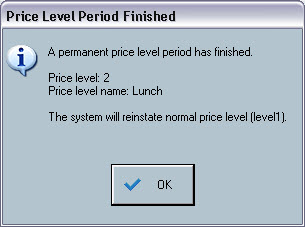
The following message occurs when an automatic price level change period ends:
NOTE: The system will reinstate the price level that was active on this POS terminal before the Automatic Price Level Change occurred.
|

See Also:
Polygon POS Management > PLU Details
Polygon POS Management > Pricing and Loyalty Point Management Overview
Product Keypad > Other Keys > Price Levels Change Keypad Button
Getting Started with Polygon POS Management