The PLU Item Details form allows you to enter the specific details about a PLU (Product Look Up). This form is used to create new PLUs or edit the details of existing PLUs.
From Polygon POS Management, Access the PLU File by clicking the PLUs button on the toolbar, Click the New button to create a new PLU, or, Highlight an existing PLU and click the Change button to edit this PLU.
|

The PLU Items Details form is divided into six key sections. These sections are described below:
•PLU Number - Every PLU is assigned a unique number that identifies the item within the system. Every PLU must have a different PLU number and once a PLU number has been assigned it cannot be used again or transferred to another PLU. PLU numbers available for use are 11 to 999,999 and 2,000,001 to 2,000,000,000. PLU numbers 1 to 10 and 1,000,000 to 2,000,000 are reserved for system use. The system will automaticallt assign a PLU number to a new PLU.
A Tip for Faster PLU Entry If you have successfully entered a PLU and are about to enter the values for a new one, you can press the New From button and all the PLU information from the LAST item entered will be copied and displayed. The next PLU number up will be assigned. All you have to do then is enter the PLU description and change the prices if required. This function is particularly handy when entering a number of related PLUs with similar characteristics.
•Item Name - This is the detailed description of the item (eg. Casc Light Pint). Please note: 15 characters is optimum for the PLU to print on one line for customer receipts and production output. If the PLU name is longer it will 'wrap' on the next line (or as many lines as required).
•POS Active/Inactive - This is a setting which you should tick if this PLU is part of your current menu. Items which you no longer sell or use can be retained but the “PLU Active” option should be un-ticked. This is useful when you have a large repertoire of menu items, some of which are not on sale at any given time. Instead of deleting items you do not currently sell, but may sell in the future, simply tag the items as not active. Note: PLUs cannot be deleted once sales have been processed containing records of this PLU number. PLUs which have been made Inactive can be retrieved for use by selecting Inactive from the View filter on the PLU File. Highlight the PLU and click Change. Tick the Active tick box then click OK. The PLU will now be moved to the Active File.
•PLU Type - There are five types of PLUs: oNormal PLUs - Which represent a product which can be ordered. This is the most commonly used type of PLU because it allows a price to be set and many other PLU configuration settings. When you create a PLU this option is enabled by default. oBundle PLUs - This denotes that the PLU has a list of PLU Ingredients, combinations of which can be collated together and replaced by this PLU. See Also: Automated Bundling oText PLUs - This PLU will prompt the user to enter in a numeric value when selected. This is used to send instructions about orders, e.g. a Text PLU called " POS# " would be used to identify which position an order should be served to. When this item is selected at the FOH the staff member will be prompted to enter the position number. If they selected number 3, the printer can be configured to print " POS# 3 " with the rest of the order details in the kitchen. Text PLUs allow only numeric information to be entered by default. oAlphanumeric PLUs - Tick this box for a Text PLU where staff will be presented with a keyboard instead of a numeric keypad. oPromptless PLUs - Tick this box for a Text PLU where the PLU name will not be included at the start of the instruction, only what is entered on the keyboard or numeric keypad.
•GST Type - You must choose the GST type applicable to this item from one of the four ‘GST types’ available. GST Inc is the default setting for a new PLU. Note that items defined as GST Free should be separated into a Revenue Account reserved specifically for GST Free items. See Also: Some Important GST Information
•Revenue Account - This is the revenue account that will be charged when this PLU is sold. For example, common revenue accounts include: Food Sales, Beverage Sales, Bar Sales, etc. To assign a revenue account click the Browse button Note: A Revenue Account must be assigned to every PLU. See Also: New revenue accounts can added to from the Polygon Back Office > Chart of Accounts
By selecting the multiple account assignment option you can charge revenue from the sale of a PLU to more than one revenue account. For example a set menu of $35 per head may contain two courses and a glass of wine, where the revenue split is calculated as 70% Food Revenue, and 30% Alcohol Revenue.
•PLU Class - This is where the PLU is assigned to a Class for production printing and reporting purposes. Click the Browse button
•Reporting Category - This is where the PLU is assigned to a Reporting Category for reporting purposes. Click the Browse button
•Production Category - (This option is not visible if you utilise Legacy POS installations and applies only to Polygon POS installations.) This is where the PLU is assigned to a Production Category for defining production output. Click the Browse button
•Dispense Unit Type - Define how the unit will be sold – either by the unit or by weight. If an item will be sold by weight, a weight scale peripheral should be configured at the FOH so measured weight of a product can be sent directly to the POS Terminal. For more information about setting up a weight scale peripheral, see section POS Management > POS Peripheral Details. For information about configuring a Scale Tare Item see section below labeled Scale Tare Item.
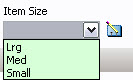
•Item Size An ‘Item Size’ modifier can be used as an upsize function to adjust the price of a PLU after it has been entered. For this function to work, all of the relevant PLUs need to be named correctly and have their size specified in this field.
For example: Milkshakes are sold in three different ‘item sizes’ – small, medium and x-large – and come in three different flavours – chocolate, vanilla and caramel. So there are a total of 9 different PLUs in the PLU Product File (eg. Small Choc, Medium Choc, X-Large Choc, Small Vanilla etc).
To add an ‘Item size’ to the PLU Item Sizes file, click on the pick list button
Within each PLU, by clicking on the Item Size drop-down box, assign the appropriate item size.
A PLU Size change (upsize) button (see section Keypad Button Details > Other Keys) is created on the Product Keypad to enable these sizes to be adjusted. In other words, if a Small Chocolate Milkshake has been selected at the POS Terminal and the X-Large PLU Size change button is then selected the price and PLU name will be updated accordingly.
•Cold Item The Cold Item tag is used in conjunction with Bag Labels in Polygon Paperless Kitchen. If one or more items in the sale have the Cold Item tag applied and indicator will be included on the printed Bag Label to remind staff that items will need to be packed that may be in cold storage and not present on the servery bench. You can read more about Label Printing from KMS here.
•POS Location Assignment This is where you determine where the PLU will be available to be sold. If you have more than one location you can specify at which locations this PLU will be available. Click the browse button
|


•Item Price - The Polygon POS Management system allows for five different price levels. Price Level 1 is considered the default and this is where the price of an item should be entered. If the item is to be sold at different prices, then a different price can be entered in another price level. Some common examples of the use of more than one price level is for happy hour promotions, weekend or public holiday pricing or different pricing for members. See Also: Polygon POS Management > Product Keypad > Other Keys > Price Level Change If you are adjusting the prices for a number of PLUs the see section Pricing & Loyalty Point Management. This section describes how to adjust prices for a number of PLUs at once.
•Awarded Points - For users who have purchased Polygon Loyalty add-on module, this is where the amount of points a customer receives when purchasing this product is established.
•Redemption Points - For users who have purchased Polygon Loyalty add-on module, this is the amount of points a loyalty member can redeem to purchase this product.
•POS Location Pricing - Multi-location users are able to set the 5 price levels for each PLU at each location. This means that each location is able to utilise the 5 different prices for a PLU if required. Creating PLU Prices for a Specific Location: To set different prices for one PLU to be sold at different locations: oAccess the PLU File; oHighlight the required PLU, and choose the Change button; oChoose the Browse button oFrom the drop down box, choose the location and enter the prices at which this PLU will be sold at this location as required. Repeat this step for each location which needs a different price oThe location prices will be saved when the the PLU File's OK button is clicked.
•Open Priced PLU - Ticking this box means that each time this PLU is selected at the Front of House, staff members will be prompted to enter a price for this item.
•Combo PLU - To create a PLU for a sale item that includes a mixture of regular sale items at one ‘bundled’ price, tick the Combo PLU Box. With this feature enabled the system will remove the price from a specified number of sale items entered after this combo item, hence including them in the price. For example: oA meal package that is sold for $12 and includes a choice of either beef burger or veggie burger, side of chips or side of vegies, and any soft drink, is set up as a Combo PLU; oThe Combo Item Qty is entered as 3; oAt the terminal, the sale item ‘Lunch Burger Special’ is selected. The customers choices are entered and displayed without their usual price and with a ‘c’ in front of them as follows. NOTE – REVENUE: If items for this combo belong to different revenue accounts, you will need to enable multiple revenue accounts and specify the percentage split for the sale price of the Combo PLU itself. See above section: Multiple Revenue Accounts. NOTE – STOCK CONTROL: Stock levels will be successfully adjusted by the sale of items included in a combo. Therefore, there is no need to assign a stock link to the Combo PLU itself.
•Swap Trigger PLU - Ticking this box indicates that this PLU will be the trigger point for a swap to take place within the Ingredients PLUs programmed for items sold via Quick Service Ordering Mode (QSO). See the sections: Quick Service Ordering Mode (QSO) and Swap Trigger PLUs. •e-Gift Card PLU - Ticking this box indicates that this PLU will top up the balance of an e-Gift Card by the amount specified in the item price. The card will need to be swiped at time of purchase.
•e-Hybrid Card PLU - Ticking this box indicates that this PLU will top up the balance of an e-Hybrid Card by the amount specified in the item price. The card will need to be swiped at time of purchase.
•Customer Ordering PLU - This option only available to users who have purchased the Polygon Customer Ordering add-on module. Ticking this tick box makes this PLU available to Polygon Customer Ordering keypads. Ticking this box will also add the Customer Ordering Interface tab to the top of this PLU Details form. Additional Customer Ordering options can be configured from this tab. The Customer Ordering Interface Tab is documented later on this page. See Also: Addendums > Polygon Customer Ordering •Scale Tare Item - When using scales to weigh purchases at POS while the product is in a container or packaging, a Tare PLU is used to deduct the package weight from the total measured weight. To setup a Tare PLU, create a new PLU, and name it appropriately (eg. Small Cup), then tick the "Scale Tare Item" tickbox and then enter the weight of this package (in grams) into the Tare Item Weight text box. NOTE: A Scale Tare Item must have it's Dispense Unit Type set to 'Sold by the unit', as you are specifying the weight in grams as a static amount, not as a weighed amount being read from the scales. •Topping Amount - When using PLU Code Mapping to facility the generation of a QR code on a production label, to be read by a drink-making machine, you can enter a value to be using when calculating the TOPPING_LEVEL string. •Make Time - The Make Time value is used when working with the Kitchen Management System (KMS). Enter the approximate amount of time (in minutes) to be applied to this item. This value is used to calculate the current load of kitchen display screens. We suggest that it may be easier for you to use a 'weighted minute' value. For example, basic items on your menu should be applied a score of 1 minute while larger or more complex items should be assigned an appropriately weighted minute value, perhaps 2 for items that would take twice as long, and 3 for items which may take 3 times as long. Using this 'weighted' method will mean that you don't need to determine exactly how long each item on your menu takes to make! For more information about the Kitchen Management System, see section Polygon POS Management > Kitchen Management System (KMS) - Paperless Kitchen - General Information
•Include in KMS Reporting - This setting is used when working with the Kitchen Management System (KMS). It determines whether this PLU will be counted towards the Total Items figure shown on a kitchen display. For example, leave this tick box unchecked for PLUs which are instructional only such as: 'Soy milk', 'Weak', 'Strong' etc.
|
•PLU Barcodes - If a Barcode Scanner is being used at the POS Terminal, then barcode/s for a PLU can be entered. You may simply type in the barcode number or, alternatively put the cursor in the barcode field and scan the item.
•Health Instructions - This entry box allows the programming of any desired text that you wish to print on the customer receipt (tax invoice) underneath the PLU. For example, you may want “97% Fat Free” or “Contains Gluten" to appear underneath the item.
•Recipe Instructions - This entry box allows the programming of detailed instructions that will print underneath the PLU on the production docket/s for staff to read. Recipe instructions can help to ensure continuity and consistency in the items produced in your establishment. oFor example, the detail entered for a Smoothie might be “1/2 banana, 1 scoop strawberries, 200ml milk, 1 scoop yoghurt” to ensure staff are aware of the required ingredients.
•PLU Ingredients - This is where you can program 'QSO' ingredients if you are using QSO (Quick Service Ordering) Mode. Please refer to Quick Service Ordering Mode (QSO) for more information about QSO Mode. This is also where you can program 'Production Only' ingredients, allowing items to be generalised when sent to production screens or printers. For example, three different types of beef burger from the menu may all be sent to the griller production station as 'beef pattie'. For assistance with setting up production ingredients for the first time, contact Redcat support on 1300 473 322.
|
•Keypad Navigation Category This is where you define the Keypad Category to which the PLU belongs. It can be selected from a list displayed when you click on the Browse button Care should be taken when designing your PLU-Keypad Category assignments. Remember that all of the PLUs that belong to a keypad category will inherit the properties of the category (e.g. instruction) and that all of these PLUs will be displayed together in a pop-up box when using a category key at the POS Terminal. For Legacy POS installations, another important concept is Category Printing. Keypad Categories are used when tagging which categories will be printed on each of the production devices.
For example, you can tell the system to print the “White Wines” and “Red Wines” categories on the Bar printer and the “Mains” and “Warm Salads” on the Kitchen printer Note: If you add a new category to the system you need to assign this category to the appropriate printers. See section Category Printing for more information about assigning categories to production printers.
•...Automatically Linked to Category This field can be used to enable a PLU to be directed down a different link path to other PLUs in the same category. For example: oThe Beef Special, Chicken Special and Fish Special PLUs all reside in the Keypad Category - Specials. oThe category Specials is linked to the category Side Dishes. oThe Beef Special PLU is assigned an Automatic Link to - Beef Instructions. oThe category Beef Instructions is linked to the category Side Dishes. At the POS Terminal, when the category Specials is chosen the three PLUs - Beef Special, Chicken Special and Fish Special - are displayed. Selecting the Chicken Special or Fish Special will result in the options for Side Dishes being displayed next. However, if the choice is Beef Special, the Beef Instructions options are displayed (eg. rare, medium, well done), followed by the options for side dishes.
A PLU modifier can be used in two ways – to save keypad space by modifying one generalised version of a PLU, or as a filter for a keypad category pop up list.
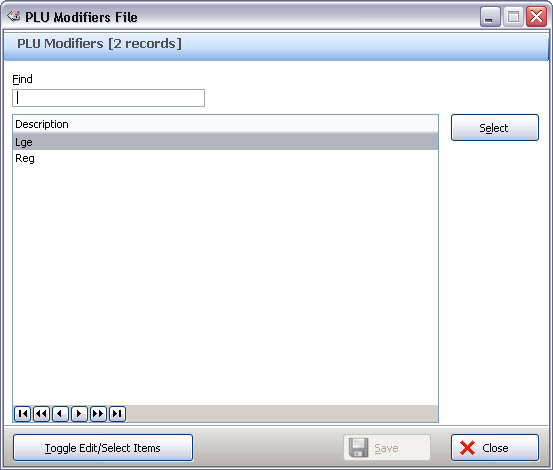
Example 1 This example illustrates how a keypad modifier can be used to save keypad space: oThere are four different types of soft drink – Coke, Diet Coke, Sprite and Lift – and they are available in three different sizes – Small, Medium and Large. So a total of 12 PLUs are present in the PLU file. oPLU Modifiers ‘Sml’, ‘Med’ & ‘Lrg’ have been created within any PLU Update Form by entering the name of the modifiers (case sensitive) in the modifier field box. To enter a new entry or edit an existing entry click on the pick list button
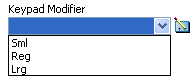
Clicking the Select button will make the names available for use in all PLUs. Keypad Modifiers can now be selected from the Keypad Modifier drop-down box on the PLU Details form (shown below).
oIn the PLU Update Form for Large Coke, select the PLU modifier as ‘Lrg’. For the Small Coke, ‘Sml’, etc oEach PLU must contain the same text shown in the Keypad Modifier list. e.g The PLU name for a Large Coke must be "Lrg Coke" because the Keypad Modifier is "Lrg". This is case sensitive. oOnce all of the relevant PLUs are linked to a modifier, create a PLU Modifier keypad button for each size ‘Small’, ‘Medium’, ‘Large’ (see section Product Keypads > Other Keys) oCreate generalised PLU keypad buttons for Coke, Diet Coke, Lemonade and Solo (see section Product Keypads > PLU Keys). These buttons can be created using any size PLU, such as Medium Coke, the button display name however, should not specify size. Pressing the modifier button first, such as ‘Small’ and then the product button such as ‘Coke’ will search the PLU file for a Coke that contains the word Sml, and the price and display name will be adjusted accordingly. As a result, only one button is needed for each product rather than three.
Example 2 This example illustrates how a a keypad modifier can be used as a filter for a keypad category: The ‘Medium’ modifier button is selected on the keypad before the ‘Soft Drinks’ category button, the category will then be filtered so that only the soft drinks with a Medium modifier are displayed in the category pop-up. Important: The PLU description must contain the PLU Modifier name. eg ‘Sml Coke’ or ‘Coke Sml’. The rest of the PLU name must match across different sizes. eg. 'Sml Coke' and 'Lrg Coca Cola' will not be recognised as the same product.
•Key Preview This gives an example of what this PLU will look like on the Product Keypad.
•Key Pad Button Image - PLUs can be assigned a default image to be displayed on its keypad button. To assign or clear an image click the Image Selection button Detailed instructions for assigning images when accessing the Redcat Cloud platform can be found here.
|
|
•Linking PLUs to Perpetual Stock Control For users who have purchased the Polygon Inventory add-on module, this is where a PLU can be linked to either a Stock Item or a Recipe for perpetual stock control purposes. In other words, by creating such a link, every time the PLU is entered as part of a POS transaction, stock levels are automatically updated for the linked item(s). Stock related settings are available from the Inventory tab at the top of the window. Note: For information on the creation of Stock Items and Recipes refer to the Polygon Inventory chapter.
Creating a Stock Link Linked Item •Click on the browse button Handy Hint: If you need to create a new stock item or recipe you can do so as per usual from within this window. (See sections Stock Items File and Recipes File for more information about creating stock items & recipes) •Highlight the Stock Item or Recipe that this PLU will link to and then click Select. •Now you have created a link you need to choose a stock transaction type (see below).
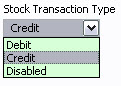
•Stock Transaction Type This is where you determine what you would like to happen to stock levels when this particular PLU is sold or used as part of a recipe. These options are described below.
oCredit If you select ‘Credit’, each time the PLU is sold the linked stock item will be credited and stock levels will be decremented accordingly. This is the default selection and will be appropriate for the majority of PLUs. oDebit If you select ‘Debit’, each time the PLU is sold the linked stock item will be debited and stock levels will be incremented accordingly. This is uncommon; however it may be used in conjunction with instructional PLUs. For example, if an ingredient is subtracted from an order, the instruction PLU (eg. No Cheese)' can be set to be a debit to ensure that stock levels are not decremented (a credit from the standard recipe and a debit from the 'No' instruction). oDisabled This disables perpetual stock control for this PLU. oClear If you wish to clear a linked item, right click in the Linked Item field and select Clear.
Multi-Department Users – The stock items which are displayed for you to choose from are all those in the Admin department. PLUs are not specific to any one department. The terminal through which the PLU is sold will determine in which department the stock holding will be decreased. Please see section Polygon POS Management > Integration with Polygon Back Office for more detail.
•Using Instructional PLUs to Increment a Stock Holding When running perpetual stock control, it is sometimes desirable to actually increment, rather than decrement a stock holding. For example, a PLU for a Pizza With The Lot would be attached to a recipe which details the amount of each stock item to decrement. Included in this recipe would be a portion of mushrooms. If your customer orders a Pizza With The Lot with no mushrooms, an instructional PLU ‘no mushrooms’ would be used to let the kitchen know, however the sale of the original Pizza linked to the recipe would still cause the mushroom stock holding to be decremented. To counteract this, a recipe containing just the portion of mushrooms could be created, and linked to the ‘no mushroom’ PLU. When creating this link, the update stock instruction must be selected as Debit rather than credit. This will then INCREASE the stock holding rather than decreasing it.
|
This tab is only available to users who have purchased the Polygon Customer Ordering add-on module. This tab allows you to configure how this PLU will be presented to customers who are using the Customer Ordering Interface. Users who have transitioned to utilising MIM in Polygon Central for programming customer ordering menus will only see this tab if the PLU existed as a customer ordering PLU prior to moving to MIM. All data shown will be read-only so that it can be cross-referenced against the MIM programming is desired.
•Item Display Name - Enter the text which will be displayed to a customer when ordering online. This allows more characters than the standard PLU item name, which may be abbreviated for use at FOH. •Modifier Display Name - This is the long name for the modifier (if applicable) for this PLU. It will be displayed within web ordering. For example, the modifier might be 'Sml' but the long name you want to display with the item online is 'Small'. •Energy - Enter the energy value (in kJ) for this PLU.
•Item Information - Enter additional information about this item here. This information will be displayed with the item browser image and item name on the Customer Ordering website. •Item File - To assign an image to be displayed for this product when viewed online, click the Image Selector button. Note: .PNG format may be used, however the image preview will not be visible as a preview in Polygon POS Management:\ Detailed instructions for assigning images when accessing the Redcat Cloud platform can be found here. •Specific Image Types - If you need to assign different image for third party ordering providers (DoorDash, Uber Eats, Google etc) due to their individual image specifications, you may do this by choosing the provider from the Type drop-down field, and proviing the URL of the relevant image.
Notes specific to images for DoorDash. If you wish to assign specific images for DoorDash, a configuration setting is required in Polygon Central and you will need to touch base with your Redcat contact to make sure that it is enabled as these settings are not usually exposed to Admin users. If this setting is enabled, only images assigned to DoorDash in the Images section of the Customer Ordering Interface tab will be exported with the menu. It must be noted that the image listed in the Image File field and used for Polygon Online Ordering will NOT be used as a fallback image if there is no image assigned specifically for DoorDash - care must be taken to ensure that all relevant PLUs have a DoorDash specific image assigned. If this setting is disabled, any DoorDash specific image assignment will be ignored and the same images that are assigned for Polygon Online Ordering will be included in the DoorDash menu export.
For more information about the Polygon Customer Ordering add-on module, see section Addendums > Polygon Customer Ordering
|
This tab is only available to users who have enabled Bundle Pricing under POS Terminal Settings | Sale Settlement in the POS Location System Settings. For details on completion of this tab, and the functionality it enables please see Automated Bundling. |
This tab is only available to users who have enabled the Bill of Materials Module in the POS Location System Settings. For details on completion of this tab, and the functionality it enables please see Bill of Materials (BOM). |
•Enter the Item Name; •Select the Revenue Account; •Select the PLU Class that this PLU will belong to; •Select the Reporting Category that this PLU will belong to; •Enter the Item Price in Price Level 1; •Select the Primary Keypad Category that this PLU will belong to; •Press OK to save.
|
The New From button can be used to speed up data entry, especially if you are creating a large amount of PLU's that will share the same characteristics (e.g. Revenue account, PLU Class, Reporting Category and/or Keypad Category)
Quick Example If you have 10 varieties of drinks that you need to enter. They will all have the same price and they will have the same characteristics, only the PLU name will differ. •Create the first PLU and complete all required fields; •Once created, highlight this PLU in the PLU File and press the New From button; •This will create a new PLU and fill in the PLU details form with the same configuration as the highlighted PLU; •Enter the Item Name for the new PLU; •Press OK to save. •Continue this process until all PLU's have been created.
Keyboard Shortcut Tips The underlined character of any field label or button label within the form indicates a keyboard shortcut, accessed using the ALT key on your keyboard. For example, press ALT + 1 to navigate directly to the Level 1 Price field on the PLU Item Details form.
Pressing CTRL + ENTER is the keyboard shortcut to the OK button on any form.
|
See Also:
Getting Started with Polygon POS Management
Polygon POS Management > Keypads Overview
Polygon Inventory > Stock Items File
Polygon Inventory > Recipes File