This form allows you to add and edit the specific details of a Media Keypad button. It is accessible from the Media Keypads Details form.
From Polygon POS Management, Select Keypads from the main menu, Then select Media Keypad. This will load Media Keypad Details form. To add a new payment type, click on a blank media keypad button, or, To change an existing media keypad button, click on the button which you wish to change.
|
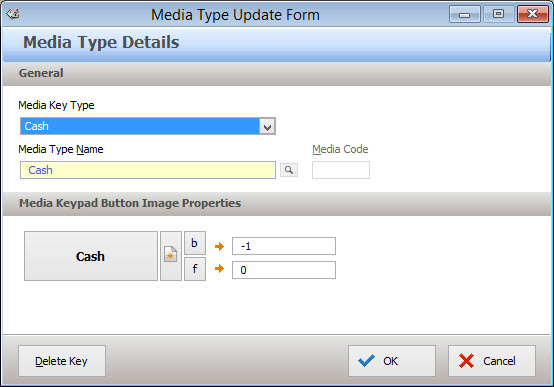
Completing Media Type Details
The following options are available for Media Keypad buttons:
Media Key Type Select the Media Type that this button will represent. The following Media Types are available: •Cash - This button is used when a customer pays by cash; •Cheque - This button is used when a customer pays by cheque; •eGift Card - This media type will only operate successfully if you using the Electronic Gift Card functionality in conjunction with the Polygon Loyalty add-on module. This button allows sales to be finalised with an eGift Card (voucher) as the payment media. •EMS Ledger Charge - This key allows you to finalise a sale to a ledger, when using an EMS (External Membership System) third party interface. •eHybrid Card - This media type will only operate successfully if you using the eHybrid Card functionality in conjunction with the Polygon Loyalty module. This button allows the sale to be finalised with a eHybrid Card (loyalty member cash balance) as the payment media. •Rewards Dollars - this key will allow a customer to pay for a sale (fully or partially) with Rewards Dollars in conjunction with the Polygon Loyalty add-on module. When a reset containing this media type is performed, the media record is converted into a discount line in the sale utilising the system PLU -9 Loyalty Redemptions. The discount will apply GST prorata according to the items contained within the sale. Note: The option available when programming the button will display the name assigned in POS Location Settings | Polygon Add-on Modules | Loyalty | Cloud Based Loyalty System. •EMS Balance Enquiry - This key allows you to view the balance of a member's account, when using an EMS third party interface. •Merchant Card - This key allows a sale to be finalised to the selected Merchant Card. Click on the browse button See section Polygon POS Management > Merchant Cards File for more information about adding new merchant cards. •Client Accounts List - This key will prompt the POS user to select a Client Account from a list. The sale will be finalised to the selected Client Account. See section Polygon POS Management > Client/Member Accounts for more information about adding new Client Accounts. •Management Accounts List - This key will prompt the POS user to select a Management Account from a list. The sale will be finalised to the selected Management Account. See section Polygon POS Management > Management Accounts for more information about adding new Management Accounts. •Client Account Charge - Allows you to assign a Client Account to a button. The POS user will be able to quickly charge sales to this Client Account by clicking this button. To select a Client Account, click on the browse button See section Polygon POS Management > Client/Member Accounts for more information about adding new client accounts. •Management Account Charge - Allows you to assign a Management Account to a button. The POS user will be able to quickly charge sales to this Management Account by clicking this button. To select a Management Account, click on the browse button See section Polygon POS Management > Management Accounts for more information about adding new Management Accounts. •Integrated EFTPOS - The Integrated EFTPOS key type will only operate successfully if you have purchased the Polygon Payments Interface module, where the EFTPOS pinpad is integrated with the POS terminal. This button will enable the pinpad, and begin the user prompt process for a card payment. Note: If you do not have Integrated EFTPOS Merchant Card buttons should be used instead. Merchant Card buttons are described above. For more information about Polygon Payments Interface, See Also: POS Location Settings > Add On Modules > Polygon Payments Interface, Polygon POS Management > POS Peripherals. •PMS room charge - This key allows you to finalise a sale to a room number, when using a PMS third party interface. •PMS folio charge - This key allows you to finalise a sale to a folio, when using a PMS third party interface.
Delete - To clear the selected button, click the Delete button, then click OK to save the changes.
|
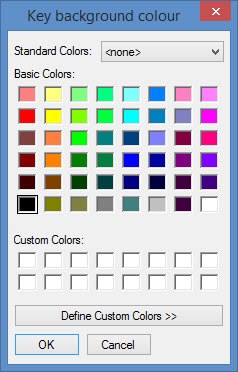
Media Keypad Buttons can be assigned background images, background colours and text colours. To assign an image - click on the image button Detailed instructions for assigning images when accessing the Redcat Cloud platform can be found here. To clear an image - click on the image button To change the Background or Font colour - The colours of a particular button may be changed from the system defaults by clicking the ‘b’ and the ‘f’ buttons (for background and font) from the keypad button update form. You can also adjust the existing colours to create custom colours and add them to the bottom of the palate for easy use. This basic colour palate will appear when you press the ‘b’ or ‘f’ button. Select a colour and press OK to apply.
|
Once you have configured the button, click OK to save your changes.
See Also:
Polygon POS Management > Media Keypad
Getting Started with Polygon POS Management